Tuesday, 20 August 2013

WE ARE NOW ON ETSY!

We are please to announce the opening of our new shop on Etsy! We sell Downloadable Printable PDF's, that you can access straight away. We currently have Barnyard Animals and Alice in Wonderland Party Printable's available, with many more items waiting to be added!

Etsy provides a market place for crafters, artists and collectors to sell their handmade creations, vintage goods and craft supplies. Etsy is a trusted and vibrant community of 15 million buyer's and creative businesses.

Instant downloadable PDFs are a very convenient and cost effective, and what's more... there is no waiting on the Postman or shipping costs! You can also pay for your items via PayPal, so you know your details are protected.

Check out our brand new shop today, and you could be downloading your own party within a matter of minutes! 

http://www.etsy.com/uk/shop/TheGrapeVineEvents

Check out some of our items we have available:

Vintage Alice in Wonderland Birthday Party Invite 
£3.99

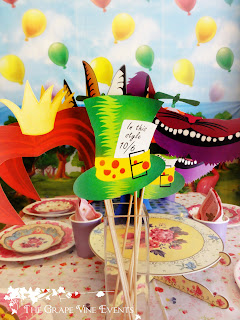
 Alice in Wonderland Masks
£2.50
 
 Barnyard Animal Birthday Party Invitation
£3.99
 
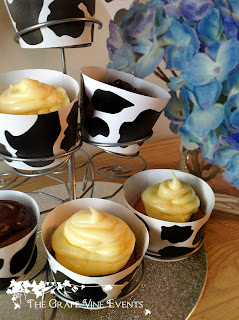
Cow Print Cupcake Wrappers
£1.50

Wednesday, 31 July 2013

10 MONEY SAVING TIPS FOR YOUR WEDDING

After the excitement of getting engaged, couples are eager to sit down and start planning their wedding. Though, it soon dawns on many engaged couples that getting married doesn’t come cheap! With the average wedding in the UK now costing around £17,000, it is little wonder that many couple are opting to elope and tie the knot overseas or put off getting married altogether. Or worse – having to compromise on your dream day, due to lack of available funds.

However with a bit of research, patience and a little creativity, you can still create the perfect wedding day and one you can look back on in many years to come with fond memories.

We have come up with a list of 10 examples of how to make your budget stretch even further. By following these tried and tested money saving tips, you can save yourself a small fortune and still have a spectacular day.
 

1.     CHOOSE A DATE OUT OF SEASON

Everyone wants to get married at the height of summer when the weather is warmest. Yet this is also the most popular time of year to get married, therefore the most expensive. Consider getting married out of season (Peak wedding season May to early September) as less couples do this, the costs are also considerably cheaper. Most hotels have a summer and a winter price list and there is quite a big different in price. If you must get married in peak season, think about getting married on a weekday or even a Friday or Sunday. As most brides opt for a Saturday wedding you will find this day will always be the most expensive. Generally hotels and wedding venues are a lot quieter during the winter months (excluding Christmas, New Year, Valentines) so your money will stretch a lot further, potentially saving you thousands. Whereas in the winter, most of the more upmarket hotels more affordable than they were in the summer months. And if you are lucky some will even throw in a few extra’s for you!
 

2.     BUFFET OR HORS D'OEUVRE INSTEAD OF SITDOWN MEAL 


Most people want a sit down, 3 course meal at their wedding. But unfortunately this can really push the price up. By having a buffet option, this will work out a lot more cost effective. Many wedding venue’s have caught onto this trend and offer many buffet options ready for couples to choose for their big day. Prices generally start quite low, each costing slightly more, for a simple buffet, with each option slightly more than the last with a few extra's added on, which does become more expensive, the more options you have. Though it would still be cheaper than a sit down meal. There are also hot fork menu's as well wuth are become popular and are still very formal.

However a buffet does have some benefits. Generally, even for fussy eaters, they are bound to find something they like. And for your really hungry guests, they can even go back and get seconds! Also don’t be afraid to ask your venue to serve your wedding cake as your dessert. This will also save you money.
 

3.     D.I.Y DECORATIONS 

If you are creative and love to make things, then why not make your own decorations? There are many quick and easy decorations you can make, and many venue’s today will let you in to dress the room the night before, so you don't have to worry about this on the day of the wedding, so you can get your beauty sleep!

However, this does depend on how creative you are. You do not want to take on a project that is far too ambitious, where you have over reached yourself, and you find that you have spent time and money on materials only to find what you have made looks doesn’t look anything like how it is supposed to or that you have ran out of time and haven’t made enough.

Though if you are not creative, please avoid making your own decorations and leave it to the professionals. If you are on a tight budget. Be honest with them and ask an event decorator what can they do for you with your budget. Yes we all want to save a few pounds, but it could end up looking like a dog’s dinner, or something a child has made, which is not good enough for your wedding, and cost you more money in the long run.


4.     SWEET TABLE FOR EVENING GUESTS 

Who doesn’t like sweets and chocolate? Have you ever been to a wedding where half the buffet food is thrown away at the end of the night? What a waste! Many people eat before they go out and by the time guests arrive at your reception, all they really want is something to pick at, not second and third helpings of the buffet.

A sweet table is a great addition to any wedding. They are fun and really get your guests talking. You can even have your names and date of your wedding printed on the candy bags, which is a nice memento for guests to take home. 


5.     BAND, DJ OR IPOD?  

In reality, if we could afford to do so, many of us would hire a band. Though having a DJ is a good, affordable option. However, if neither option is within your budget, have you thought about loading music onto an iPod? Not only are you able to load on thousands of songs from every genre, but this is a great way to make sure everyone is catered for!  When you send out your invitations, ask your guests to tell you their top 3 songs to get them up and dancing and you can make sure they are loaded on the iPod. You might want to ask one person to look after it throughout the night, so that someone is there to play your first dance song, or to press pause if you want to say a few "thank you’s" later on.’ Then all you need to do is stick it on shuffle and you can dance the night away. Oh and not to mention its free!
          

6.     MAKE YOUR OWN STATIONARY  

There are lots of places nowadays where you can pick up your own DIY wedding invitation kits. This saves you money by buying the printed material, but you assemble them yourselves. Lots of Brides are now having “craft evenings” with their bridesmaid’s family members. However if you’re not too bad on the old computer, have a go at making your own. You can add embellishment later on such as lace and pearls, ect.
 

7.     “WE CAN’T AFFORD A HONEYMOON!”  

We think it is so important to try and squeeze in at least a few days together after the wedding, where it is just the 2 of you. Shop around and see what the last minute deals are a few days or weeks before the wedding. However another great idea would be to ask your guests to contribute. Rather than registering for more stuff you don’t really want such as silver dinnerware, (let’s face it, are you really going to use this?) ask your guests to give something towards the best possible start to your new life together - your honeymoon! Just think, if you have 100 guests attend your wedding, and every guest contributed around £10 - £20, this will give you £500 - £1,000. Not bad, hey? Put this in the form of a light hearted poem in your invitations, to inform your guests. 


8.     THE VENUE  

Avoid city center venues as this will always add on a few thousand pounds, purely due to the location. However, equally getting married in a stunning country manor or castle with rolling hills in the background can be equally as pricy. Look into hotels outside of the city center, as they are not right in the think of it all. Generally their prices are much lower due to the location. Also having your ceremony and reception at the same venue can save you a small fortune, as this means everything is under one roof and you will not need to hire wedding cars, or have to decorate a whole new venue. Also try your local church hall or Masonic hall, especially if they are newly built or renovated as these will save you a fortune.


9.     CAKE  

Many brides want a big show stopping cake with 4 or 5 tiers, a different flavour for each layer, complete with intricate detail and pattern. Yet the bigger and more extravagant the cake, the more expensive they become. It is not uncommon for cakes to go over £1000! However, if you go to a top baker in your area, you have to expect to pay these prices. Try using a cake maker who runs a smaller business. You will usually find, if you do your homework, that they have just as much experience and look and taste just as good and have had many happy clients.
If your budget really is on the small side then a cheeky option is to have a styrofoam cake. This looks exactly like a normal wedding cake, it is covered in icing and your guests will never know the difference. Have some slabs of cake, which the hotel can cut up for your guests, and they will be none the wiser.  
 

10.     CAR

Do any of your friends have a fancy car that they wouldn’t mind you borrowing for the day? You can now get wedding car ribbon from many craft stores. Once the car has been cleaned and the ribbon tied to the car, you will be surprised by how much this can look like a wedding car.

Sunday, 30 June 2013

80s THEMED BIRTHDAY PARTY

We all loved the 80s didn't we? A decade full of fashion faux pas, bright colours and great music from the likes of Madonna, Michael Jackson, Bon Jovi and U2. With all these ingredients, it makes for a fantastic party theme.

We recently hired to do an 80s themed party, yet on a small budget. But we love a challenge! The whole party went down a storm and we still get thank you's and nice comments now from the birthday girl and guests. So we wanted to share our idea's with you so you can create your own 80s party, one that your guests will love that doesn't cost a fortune:

- When planning your 80s party, think the brighter and bolder, the better! We used bright colours in pink, blue and 
  yellow, as well as black and white to really bring the theme to life! 
- Cover the walls with iconic posters from the 80s of famous films like ghost busters, dirty dancing or classic 
  albums from that era from Duren Duran, U2, Iron Maiden, Madonna, ect. 
- Think of typical 80s party food such as party rings, cheese and pineapple on sticks.
- With your decorations use iconic 80s symbols such as rubix cubes, Pac Man, cassette tapes, large mobile    
  phones
- Play music from this era. You will have a great selection to choose from
- Invite your guests to come dresses in fashion from the 80s. Think big hair, mullets, rara skirts, ect

SWEET TABLE AND FOOD
This went down a storm! All the sweets we had on the table were from the 80s and really brought back lots of happy memories from childhood for the guests. Sweet tables are also great for people getting to know each other when mingling at the table. There were several times where guests would get to know each other by swapping stories from what there favourite sweets were, ect.


There was also sweets on the table, many people hadn't had since childhood, which really put a smile on their faces. (Not to mention also the 80s music we placed on and off throughout the night) Some of the sweets we had were Refreshers, Drumstick Lollies, Dip Dabs, Flying Saucers, Basset Liquorice All Sort, ect. There are many more you could use, so don't be afraid to add them if they were your favourites.
We placed sweets in a mixture of vintage jars, all in different shaped and sizes. There was also biscuits, cupcakes and in the largest jar in the center of the table was everyone's favourite: the 10p mix!


You can also do the same theme with 80s themed party food. Fill your buffet table with Party Rings, Monster Much, Space Invaders, Cadbury's chocolate fingers, jelly and ice cream, mini sausages rolls, cubed cheese and pineapple on a stick, ect. Enjoy!


CAKE AND CUPCAKE STAND
The cupcake tower was very easy to create. After buying a simple cake from a local super market, we then jazzed it up with a cassette tape runner to place around the cake. Also, we attached iconic 80s symbols on top of the cake to make it look more fun, such as rubix cubes, records, and Pac Man style characters, placing them in a different heights to that they can all be seen from the back.


The cupcake wrappers were all made up from records, PAC man characters and typical 80s type designs. Once they were applied to the cupcakes, each with a different design, they looked fantastic and really complimented the cake.


The stand we bought for around £2.00 which was a bargain! All in all the cupcakes and cake stand looked fantastic and really complemented the sweet and buffet table.

OTHER DECORATIONS
On the tables we had stand up jukeboxes and boom boxes, as well inflatable microphones and electric guitars, which everyone had a lot of fun with... especially on the dance floor! Around the walls we stuck pictures designed by ourselves of rubix cubes, records, boom boxes and cassette tapes, which had the names of well known tracks from the 80s placed around the room. As guests went around looking at the songs on the cassettes they were would start to laugh and reminisce. which got everyone talking.


We also ordered some great decorations online from a party store called Party Packs. (http://www.partypacks.co.uk/They have a great range of 80s style decorations which would compliment any 80s party theme, which also includes a very good dressing up range, tablewear, backdrops and decorations for the walls, tables and ceilings. 


MUSIC
There are so many classics from the 80s that come to mind such as:

- Frankie goes to Hollywood - Relax
- Bad/Billie Jean - Michael Jackson
- You Spin Me Round (Like a Record) - Dead or Alive
- Push It - Salt & Pepa
- Living on a Prayer - Bon Jovi
- Like a Virgin - Madonna
- Atmosphere - Joy Division
- Walk This Way - Run DMC & Aerosmith

The list is endless!!!

80s music is happy, and easy on the ears and doesn't really cause any offence so there is bound to be something from that era that everyone would like. Although some would love nothing more than playing 80s music all night, some of your guest may get a little bored and might want a bit of variety. Though it is your party you can play want to like, but from experience a great party is one where everyone has had a a great time, not just the person who's birthday it is.
Have you had an 80s party before? Have you been inspired by our post? We would love to hear your thoughts below. 

Sunday, 19 May 2013

BLACK, WHITE AND PINK THEME

For those of you who do not like to throw themed parties, colour themes can work equally as well. Using 2-3 colour's that contrast well together can look just as good. We are going to show you a party we did recently for a sweet 16th birthday partyu in a black, white and pink theme. This also works really well at weddings or female birthday parties. Depending on how adventurous you are, you can also use patterns as well, to really enhance the theme, and give it a sophisticated look. 

BUDGET
We wanted the venue to look sophisticated yet fun as the event was for a sweet 16th birthday party. We had to work to a small budget and an even smaller time scale - around 2 weeks! Our budget we were given was £200.00. We want to show you how you to can make your money stretch further, and create a stunning party that you would be proud of and impress your guests. 

Our budget:

Cake £65.00
Decorations £50.00
Invitations £25.00
Sweets, Cupcakes, Biscuits  £60.00

TOTAL = £200.00

SWEET TABLE


The chevron pattern is really popular at the moment so we used this pattern to create a background for the sweet labels. These are very easy to make: 

- Once you have designed them on your computer, cut them out. 

- Using a hole puncher, punch 2 holes at the top of the label.

- Tie the ribbon around the jars and thread it through the hole front ways, so that the excess thread drapes      
  down at the back of the tag. Make sure you don't put it too short, as it looks very effective draped down   
  the back of the label. 

All the sweet jars were filled with pink, black or white sweets such as humbugs, flumps and shrimps. 

SIGNS AND LABELS
                                       
We wanted to use the chevron pattern that is very popular at the moment. For the sweet jars, we made all the labels using the same pattern and text and were then tied around the necks of the jars.


We made a larger sign for the candy bar using the same theme and text.


For a fun twist to the party, we had a bar set up making Mocktails. They are similar to the alcoholic versions, though without the alcohol. During the party, the guests got behind the bar and mixed there own non-alcoholic drinks in a cocktail shaker, which they found to be lots of fun!

CAKE

The fantastic cake, made by Cake HQ, was created in the parties themed colours, with a ruffled bottom tier, black and diamante ribbon, which looked (and tasted) fantastic!


We saved money on having the birthday girls Step Mum make these delicious cookies and cupcakes, rather than hiring a baker, as the budget wouldn't stretch that far. She got a simple biscuit recipe on line, covered them in icing, then piped around the edges. All the cookies and cupcakes were covered in either white, pink or black icing. We also wrapped the cupcakes with elegant looking swirly designed wrappers in black and   
white, which we picked up from a pound shop, and looked great!

BUNTING

We made our own bunting using some of the same patterns. This was displayed over the buffet table

WALL STICKERS

Around the walls we placed stickers of chandeliers, birdcages, and elegant looking chairs to make the room look sophisticated. As the walls were white, these made a great impact and looked beautiful. These stickers  do not damage the walls and leave no marks, Once you are done with them, after the party, simply throw them away.


POM POMS

We made several pom poms and hung them from the ceilings in the theme colours.
Follow this link to see how they were made:

http://thegrapevineevents.blogspot.co.uk/2013/04/how-to-make-tissue-paper-pom-poms.html

FOOD


Much of the food purchased was in pink, black/brown and white/pale colours in keeping with the theme. Just like the cookies, the food was displayed on black, pink or white trays, with patterned paper underneath, which looked very sophisticated.


ROOM SHOTS

                                                    
THE BAR
THE SWEET TABLE


Monday, 22 April 2013

HOW TO MAKE TISSUE PAPER POM POMS

Pom poms are a cheap and very attractive looking decoration that can be used for many different events such as weddings, birthdays, christenings, baby showers, high school proms - the list goes on! They are versatile, cost effective and easy to make. You can make them in any colour, big or small, they will look great once they are hung up.

However if you were to buy your own from one of the many party websites, the average price is around £6.00 for 2 pom poms. If you need to buy quite a few, this could make a big dint in your wallet, especially if you have a large venue to fill. If you have a smaller budget, but want decorations that look great, why not have a go at making your own. Many craft stores sell packs of 10 sheets of tissue paper for around 80-90p, resulting in each pom pom costing less than £1.00.

HERE IS WHAT YOU WILL NEED:

- 8 sheets of tissue paper (per pom pom)
- Scissors
- Thread OR string
- Stapler

Make sure you have a flat surface to start off with. To make your pom pom's, have your 8 sheets of paper measuring approximately 50cm high x 75cm in width. The packs of tissue paper you can buy at craft stores will roughly measure this once chopped in half. That way you now have 20 sheets (making at least 2 pom poms) of tissue paper and your paper is now the right size.

Fold over front to back so it looks like a fan. Make each fold around 1.5 inch/3-4cm in width, until you fold right to the end.

Once you have finished folding the tissue paper, tie together in the middle with your thread or string. This is to keep the tissue paper from opening up. Make sure the thread is quite long as you will also use this later on to hang them up.

At both ends of the pom pom, cut the top off to give it a round effect at both ends...

...to look like this!

Pull the ends at the bottom of the folded tissue together and staple in the middle. Don't staple the pom pom at the ends as this will make it more difficult to separate the paper. 

Do the same on other side and staple again in the middle. You are now going to pull upward the first 4 sheets of tissue paper.

With the pom pom lying flat on the surface, start to gently pull upwards into the middle. The first sheet should be almost touching in the middle. 
With the second sheet, don't pull it up as much. Do the same with the third and fourth sheet, pulling it up slightly less each time. 

Once you have done these 4 layers, turn it over, and repeat, by pulling up the 4 layers again, a little less each time and voila - your pom poms are ready to be hung up! Your first 1-2 attempts may not be the best, but after doing a couple you will definitely get the hang of it, as they are surprisingly easy to make! 

We thought we would have a go recently for a sweet 16th we did, and they looked amazing in pink, black and white. 

They really made the candy bar look great and everybody loved them!

Check back soon for our next post on how we created this sophisticated pink, black and white themed sweet 16th birthday party on a shoe string budget!

Sunday, 17 March 2013

MAD HATTER/ALICE IN WONDERLAND THEMED BIRTHDAY PARTY

We recently had the pleasure of putting together an Alice in Wonderland 7th birthday party. We love this theme, like so many people, as you really can be so creative! There are many idea’s for an Alice theme that sometimes its hard to know where to start. We first started planning this party around 6-7 weeks beforehand. The birthday girls Mum wanted a vintage look, but still appeal to the kids at the party. We thought the best way to do this was to include the original pictures from Lewis Carol’s book. We decided to use them on some decorations, and the invites to really set the tone for the party. And of course we wanted to use the party girls two favourite colours: pink and purple!

So join us down the rabbit hole and see how we put our Alice party together...

THE INVITATIONS

The old fashioned style text put together in a jumbled up fashion, but still easily readable. I got a few people to read it through first to make sure it flows easily.  

The vintage pictures from the book work so well with the miss matched text


We wanted the invites to be fun and vintage to appeal to the children. (You may need a few Illustrator skills for this one!) In the text for the invites we used classic lines such as, “We’re late! We’re late! For a very important date!” and “Off with your head!” all to add a bit of fun yet in keeping with the theme. You might what to use these in your Alice invites, as they are easily identifiable lines that all the kids know.
The pictures we used we’re of Alice defying the Queen at Croquet, the White Rabbit image at court and Alice at the Mad Hatters Tea Party. Though there are many others you could use instead such as Alice with the Cheshire Cat, Tweedle Dee and Tweedle Dum or Alice eating the cake, saying 'Eat Me' or the bottle she finds saying, 'Drink Me'.

Our invites were rolled up like a scroll and tags were tied round them saying ‘Read Me.’ The kids at school loved them! Apparently they were running around the school playground and opening the scrolls to all their friends and reading them out!

PLANNING PROCESS
Early on we knew this was only going to be a small gathering of kids as the space we were working with was rather small. We wanted to go with a Mad Hatter themed party with a bit of a girly twist.
The idea was to transform their dining room into a forest-like setting, just like in the story and try and include various different elements from the story, such as the flamingo’s from the croquet, Mad Hatters Tea Party, and the playing cards.
We ordered many decorations from a party supplies store, and for a more unique look we also made some as well.
We started making the decorations around a month before the party to make sure they looked right, and to test them out. Then we left them for a few days to make sure they held together. After all you don't want your decorations you spend lots of time on to have them fall apart at the party.

HOW TO MAKE SOME ALICE DECORATIONS.

All the decorations we have made are easy to put together, and very budget friendly.We decided early on to make some hanging decorations.

How to make some Alice in Wonderland vintage masks:


  • After designing your masks using Illustrator, print them off and cut them out carefully.


  • Using a long barbeque skewer place it on the back on the mask to the side


  • Using some sticky tape, stick the skewer to the mask, and you are ready to go and be your favourite Alice In Wonderland Charactor!


Scroll down to see the finished product on the day!

How to make hanging Alice decorations:

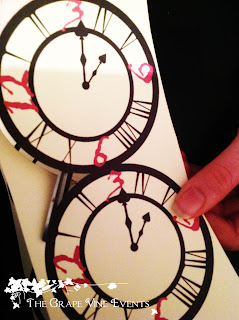
These can easily be hung from the wall or ceiling from self adhesive hooks which you can buy from pound stores, Wilkinsons, ect. We used easily identifiable objects from the story such as clocks, club suits and keys. (You may need your skills here in Adobe Illustrator again!) 


  • After designing your object on the computer, for example a clock, copy and paste, then place it next to the clock so they are slightly overlapping. When you cut them out, you don't want them to be falling apart. The reason for this is that one clock is for the front, and one is for the back.

  • Printed the clocks out, carefully cut around them. 
  • Glue the back then fold them together so they line up and are now double sided. 

  • Using a hole puncher, punch a hole at the top and bottom of clock, then thread a long piece of string through the hole, tying a knot at the back so that the clock doesn’t slide down the string. 
  • Repeat until you have around 3-4 objects on each piece of string. They also work well if the string is cut to different lengths, so that when they are tied up they all hang at different heights.

How to make Alice inspired Loot Bags:

We also make some vintage looking Loot Bags to take home, and they were so easy to make, and budget friendly. We purchased our bags from a budget store for 79p - bargain!
  • Firstly, design a nice label around 12cm wide and 10 cm in height. On our labels we had 'Take Me' at the top to carry on the Alice theme. Also we used the Alice picture where she discovers the bottle that says "Drink Me" on it. 
  • Print them off and cut them out
  • If you have any pattern cutters they look great around the edge. You might want to practice first before trying this on your final printouts. 
  • Make sure your brown paper bags are lay flat on a table or hard surface, then glue the label to the bag
  • Voila! You have yourselves some vintage loot bags! 
Scroll down to see the finished product.


THE DAY OF THE PARTY

We got their nice and early to start setting up our Wonderland. The last thing you want is to leave yourselves short of time and be rushing at the last minute. We started with the large objects first, such as putting up the backdrop, laying the table cloths on tables and then applying the shirts around to make it look a little more sophisticated. Then we added the fake grass to the breakfast far which became our loot bag display/food and cake area.

Our Mad Hatter Tea Party Set up, using lots of pink and purple, just like the birthday girl requested.

We also made some drink labels to tie around empty glass bottles we saved. If you want to do the same for your party, start saving them at least 1-2 months before hand.

A spot of croquet anyone?


Our hanging decorations

FOOD
They had cupcakes instead of a cake. The plan was to not have the cupcakes match, with different coloured wrappers with hearts all over them, we also used abstract looking cake wrappers, 'Eat Me' food mpicks we made, floral cake toppers all iced in pink, blue, white, gray icing and some even had with sugar roses and Queen crowns. The top tire of the cup cake stand had happy birthday candles and a number 7 on top. 


Even the sandwiches got a makeover!

Our Loot bags

We even had a bunny come to the party with his giant clock

We designed some Alice in Wonderland playing cards that we stuck to the alcove that separated the kitchen and dinning room

Room Shot

Which way????

The Birthday Girl!

Girls just wonna have fun! The girls at the party playing with the masks

WHAT THEY HAD TO SAY AFTERWARDS:
“Thanks for making Elena’s and the other kids day so memorable and for sharing it with us”

Did you like what you see? We hope you enjoyed reading about our Alice party. Let us know if you use any of our idea's at your party. We hope this has inspired you to make your party fantastic!
Please share your comments below!